What Is Scapy?

Scapy is a Python interpreter that enables you to create, forge, or decode packets on the network, to capture packets and analyze them, to dissect the packets, etc. It also allows you to inject packets into the network. It supports a wide number of network protocols and it can handle and manipulate wireless communication packets.
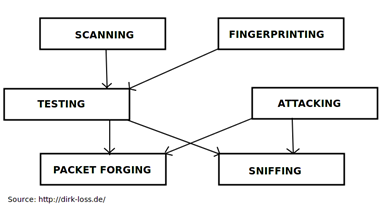
Scapy can be used to perform the jobs done by many network tools, such as nmap, hping, arpscan, and tshark (the command line of wireshark).
Earn two pentesting certifications at once!
Enroll in one boot camp to earn both your Certified Ethical Hacker (CEH) and CompTIA PenTest+ certifications — backed with an Exam Pass Guarantee.
The concept behind Scapy is that it is cable of sending and receiving packets and it can sniff packets. The packets to be sent can be created easily using the built-in options and the received packets can be dissected. Sniffing of packets helps in understanding what communication is taking place on the network.
Get Scapy
In Backtrack and Kali Linux, it comes pre-installed. You can download and install Scapy from these links:
Download: http://www.secdev.org/projects/scapy/
Installation: http://www.secdev.org/projects/scapy/doc/installation.html
Launch Scapy
After you have installed Scapy, you can launch it easily by typing "scapy" in your terminal or at the command prompt.

Do not worry about the IPv6 warning.
Protocols Supported by Scapy
Scapy supports 356 protocols; we can view the list of supported protocols by typing the command ls() in the Scapy interpreter console.
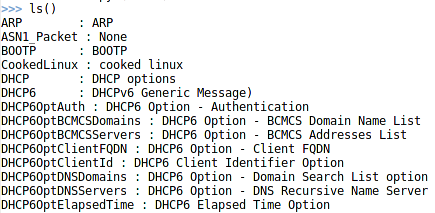
[Snip…]
Creating a Packet
[plain]
Creating a simple ICMP packet
>>>send(IP(dst="10.0.0.1")/ICMP()/"This is an ICMP packet")
.
Sent 1 packet
We are sending a packet with these contents:
-
IP() defines that it is an IP packet
-
Destination of packet : 10.0.0.1
-
ICMP echo request
-
Data in ICMP packet : This is an ICMP packet
We can watch the packet sent and its response by using "tcpdump":
[plain]
root@kali:~# tcpdump -nnvvXSs 0 -c2 icmp
tcpdump: listening on eth0, link-type EN10MB (Ethernet), capture size 65535 bytes
12:15:42.973566 IP (tos 0x0, ttl 64, id 1, offset 0, flags [none], proto ICMP (1), length 50)
10.0.0.2 > 10.0.0.1: ICMP echo request, id 0, seq 0, length 30
0x0000: 4500 0032 0001 0000 4001 66c8 0a00 0002 E..2....@.f.....
0x0010: 0a00 0001 0800 5834 0000 0000 5468 6973 ......X4....This
0x0020: 2069 7320 616e 2049 434d 5020 7061 636b .is.an.ICMP.pack
0x0030: 6574 et
12:15:42.974204 IP (tos 0x0, ttl 64, id 2777, offset 0, flags [none], proto ICMP (1), length 50)
10.0.0.1 > 10.0.0.2: ICMP echo reply, id 0, seq 0, length 30
0x0000: 4500 0032 0ad9 0000 4001 5bf0 0a00 0001 E..2....@.[.....
0x0010: 0a00 0002 0000 6034 0000 0000 5468 6973 ......`4....This
0x0020: 2069 7320 616e 2049 434d 5020 7061 636b .is.an.ICMP.pack
0x0030: 6574 et
2 packets captured
2 packets received by filter
0 packets dropped by kernel
Using the tcpdump output, we can see that the packet originated from 10.0.0.2 and was destined for 10.0.0.2. It is an ICMP echo request packet with the data "This is an ICMP packet."
Sending and Receiving Packets
Scapy has the capability to send packets and to receive packets. It provides three functions to send and receive packets on the network:
-
sr()
-
sr1()
-
srp()
sr() : This function sends the packet and returns all received answered and unanswered packets. It works on layer 3 packets
sr1() : This function sends the packet and returns only the first packet that answered the packet we sent. It does not return the unanswered packets. It works on layer 3 packets.
srp() : This function works on layer 2 packets. It cannot be used for layer 3.
sr1() example:
TCP a packet to the port 80.
[plain]
>>> resp1 = sr1(IP(dst="10.0.0.1")/TCP(dport=80))
Begin emission:
.Finished to send 1 packets.
*
Received 2 packets, got 1 answers, remaining 0 packets
-
This sends an IP packet to destination 10.0.0.1.
-
It is a TCP packet for the destination's port 80.
-
We got one answer in response.
Looking at the response packet we receive:
[plain]
>>> resp1.show()
###[ IP ]###
version= 4L
ihl= 5L
tos= 0x0
len= 44
id= 0
flags= DF
frag= 0L
ttl= 64
proto= tcp
chksum= 0x26ca
src= 10.0.0.1
dst= 10.0.0.2
options
###[ TCP ]###
sport= http
dport= ftp_data
seq= 3817102999
ack= 1
dataofs= 6L
reserved= 0L
flags= SA
window= 5840
chksum= 0x2ac3
urgptr= 0
options= [('MSS', 1460)]
###[ Padding ]###
load= 'x00x02'
The show() function on the "resp1" variable shows the structure of the packet we received in response from the destination host.
As we can see, it is an IP packet with source 10.0.0.1 and destination 10.0.0.2.
The destination replied using port 80 (http_data) and the source received the response on port 20 (ftp_data). Since we had not specified the source port in the TCP(), Scapy set it to a default value of 21 for us.
We can also see that the flags SYN(S) and ACK(A) are set in the response packet (flags= SA). This means that the port 80 is open on 10.0.0.1
sr() example:
TCP packet to the port 80.
[plain]
>>> ans,unans = sr(IP(dst="10.0.0.1")/TCP(dport=80))
Begin emission:
.Finished to send 1 packets.
*
Received 2 packets, got 1 answers, remaining 0 packets
Since the sr() function returns both the answered and unanswered packets, we can receive them in the two variables "ans" and "unans," respectively.
We have got one answer so, looking at the answer:
[plain]
>>> ans
<Results: TCP:1 UDP:0 ICMP:0 Other:0>
>>> ans.summary()
IP / TCP 10.0.0.2:ftp_data > 10.0.0.1:http S ==> IP / TCP 10.0.0.1:http > 10.0.0.2:ftp_data SA / Padding
Simply typing "ans" gives us the results for the received answered packets, which shows that one TCP packet has been received. Further details of the answered packet can be shown using the summary() function.
Note: The show() function is not available for sr().
SA (S=SYN and A=ACK) in the answered packet means that the port is open.
Now we send a packet to the closed port 8081:
[plain]
>>> ans,unans = sr(IP(dst="10.0.0.1")/TCP(dport=8081))
Begin emission:
.Finished to send 1 packets.
*
Received 2 packets, got 1 answers, remaining 0 packets
>>> ans.summary()
IP / TCP 10.0.0.2:ftp_data > 10.0.0.1:tproxy S ==> IP / TCP 10.0.0.1:tproxy > 10.0.0.2:ftp_data RA / Padding
RA (R=RST and A=ACK) in the answered packet means that reset has been received and the port is closed on the destination 10.0.0.1
Setting Timeout for a Packet
Timeout value is used to define the number of seconds to wait for the response. Think of a scenario in which we sent a TCP packet for port 80 to a host that is not reachable and we have not specified the timeout value. In that case it will keep waiting for the response. To avoid this, we specify the timeout value.
Send TCP packet to port 80 of unreachable host 10.0.0.99 without a timeout value:
[plain]
>>> ans,unans = sr(IP(dst="10.0.0.99")/TCP(dport=80))
Begin emission:
WARNING: Mac address to reach destination not found. Using broadcast.
Finished to send 1 packets.
...........................................................^C
Received 6 packets, got 0 answers, remaining 1 packets
Send TCP packet to port 80 of unreachable host 10.0.0.99 without timeout value:
[plain]
>>> ans,unans = sr(IP(dst="10.0.0.99")/TCP(dport=80),timeout=10)
Begin emission:
.....WARNING: Mac address to reach destination not found. Using broadcast.
Finished to send 1 packets.
...
Received 8 packets, got 0 answers, remaining 1 packets
Setting Flags in a Packet
Every packet we send on the network may contain some set flags. The flags set in a packet help in handling and identifying the packet and in generating suitable response for that packet.
Some of the flags of a TCP packet are:
-
PSH
-
SYN
-
ACK
-
URG
-
FIN
-
RST
Every flag has a specific meaning associated with it:
To set a particular flag in a TCP packet, the "flag" attribute is used.
Example: sr1(IP(dst="10.0.0.1")/TCP(dport=80,flags="S"),timeout=10).
In this example, we set the SYN flag inside the TCP packet using flag="S." We can also set multiple flags inside a TCP packet by simply appending the flag's first character to the flag attribute.
Example: sr1(IP(dst="10.0.0.1")/TCP(dport=80,flags="SU"),timeout=10)
In the above example, we set the SYN and URG flags.
Use Scapy inside a Python program
Scapy can be utilized not only through its interpreter console but can also be used inside a Python program by importing the Scapy module.
Example:
[c]
#! /usr/bin/python
from scapy.all import *
ans,unans = sr(IP(dst="10.0.0.1")/TCP(dport=80))
ans.summary()
Response:
[plain]
WARNING: No route found for IPv6 destination :: (no default route?)
Begin emission:
.Finished to send 1 packets.
*
Received 2 packets, got 1 answers, remaining 0 packets
IP / TCP 10.0.0.2:ftp_data > 10.0.0.1:http S ==> IP / TCP 10.0.0.1:http > 10.0.0.2:ftp_data SA / Padding
Scapy Configuration
There are many settings that can be tweaked and configurations that can be created to make the use of Scapy much easier and more convenient. Since most computers also have a wireless card, we can use the wireless interface to send our data.
Example:
[c]
#! /usr/bin/python
from scapy.all import *
conf.iface='wlan0'
ans,unans = sr(IP(dst="10.0.0.1")/TCP(dport=23))
ans.summary()
Response:
[plain]
WARNING: No route found for IPv6 destination :: (no default route?)
Begin emission:
..Finished to send 1 packets.
*
Received 3 packets, got 1 answers, remaining 0 packets
IP / TCP 10.0.0.5:ftp_data > 10.0.0.1:telnet S ==> IP / TCP 10.0.0.1:telnet > 10.0.0.5:ftp_data SA
We can see that there is too much output on screen. This configuration is called verbosity and by default is set to 1. It can be disabled by using the configuration option: conf.verb=0.
[c]
#! /usr/bin/python
from scapy.all import *
conf.iface='wlan0'
conf.verb=0
ans,unans = sr(IP(dst="10.0.0.1")/TCP(dport=23))
ans.summary()
Response:
[plain]
WARNING: No route found for IPv6 destination :: (no default route?)
IP / TCP 10.0.0.5:ftp_data > 10.0.0.1:telnet S ==> IP / TCP 10.0.0.1:telnet > 10.0.0.5:ftp_data SA
We see a warning at the start of the program run:
[plain]
WARNING: No route found for IPv6 destination :: (no default route?)
This warning can be disabled by using the "logging" module of Python.
Example:
[c]
#! /usr/bin/python
import logging
logging.getLogger("scapy.runtime").setLevel(logging.ERROR)
from scapy.all import *
conf.iface='wlan0'
conf.verb=0
ans,unans = sr(IP(dst="10.0.0.1")/TCP(dport=23))
ans.summary()
Response:
[plain]
IP / TCP 10.0.0.5:ftp_data > 10.0.0.1:telnet S ==> IP / TCP 10.0.0.1:telnet > 10.0.0.5:ftp_data SA
"logging.getLogger("scapy.runtime").setLevel(logging.ERROR)" sets logging only for errors that occur during the program execution and not the warnings. Do note that the logging setting should be used before importing the Scapy module inside the Python program.
Port Scanning
Nmap is a very popular network tool that is widely used for port scanning. But is not just limited to scanning ports; it is also capable of detecting the operating system, service version detection, banner grabbing, and much more. It also supports the Nmap scripting engine(NSE).
Nmap is implemented using C programming language and, if we look at the port scanning module, we will find that it has lots of lines of code to read and understand.
But, using Scapy, we can easily implement port scanning techniques because port scanning is nothing but sending packets to the target, reading the responses, and making suitable decisions.
Some of the port scanning techniques implemented by Nmap are:
-
TCP SYN scan
-
TCP connect scan
-
SCTP INIT scan
-
NULL scan
-
FIN scan
-
XMAS scan
-
UDP scan
-
TCP ACK scan
-
TCP window scan
These different port scanning techniques are used to find the current status of the port(s) on the host. The result of one scan might not result in telling the correct status of the port being scanned, so we cannot tell for sure what the status of the port is. That's why we utilize a number of scanning techniques to conclude with the most probable status of the port on the host.
There could be three states of a port on a host:
-
Open
-
Closed
-
Filtered
The filtered state of a port means there is some doubt about the state of the port. It could be open or closed. But we are not sure what the state is. There might be a firewall and there are also other possibilities.
Become a Certified Ethical Hacker, guaranteed!
Get training from anywhere to earn your Certified Ethical Hacker (CEH) Certification — backed with an Exam Pass Guarantee.
References

- 12 pre-built training plans
- Employer-requested skills
- Personalized, hands-on training
In this Series
- What Is Scapy?
- The rise of ethical hacking: Protecting businesses in 2024
- How to crack a password: Demo and video walkthrough
- Inside Equifax's massive breach: Demo of the exploit
- Wi-Fi password hack: WPA and WPA2 examples and video walkthrough
- How to hack mobile communications via Unisoc baseband vulnerability
- How to build a hook syscall detector
- Top tools for password-spraying attacks in active directory networks
- NPK: Free tool to crack password hashes with AWS
- Tutorial: How to exfiltrate or execute files in compromised machines with DNS
- Top 19 tools for hardware hacking with Kali Linux
- 20 popular wireless hacking tools [updated 2021]
- 13 popular wireless hacking tools [updated 2021]
- Man-in-the-middle attack: Real-life example and video walkthrough [Updated 2021]
- Decrypting SSL/TLS traffic with Wireshark [updated 2021]
- Dumping a complete database using SQL injection [updated 2021]
- Hacking clients with WPAD (web proxy auto-discovery) protocol [updated 2021]
- Hacking communities in the deep web [updated 2021]
- How to hack Android devices using the StageFright vulnerability [updated 2021]
- Hashcat tutorial for beginners [updated 2021]
- How to hack a phone charger
- What is a side-channel attack?
- Copy-paste compromises
- Hacking Microsoft teams vulnerabilities: A step-by-step guide
- PDF file format: Basic structure [updated 2020]
- 10 most popular password cracking tools [updated 2020]
- Popular tools for brute-force attacks [updated for 2020]
- Top 7 cybersecurity books for ethical hackers in 2020
- How quickly can hackers find exposed data online? Faster than you think …
- Hacking the Tor network: Follow up [updated 2020]
- Podcast/webinar recap: What's new in ethical hacking?
- Ethical hacking: TCP/IP for hackers
- Ethical hacking: SNMP recon
- How hackers check to see if your website is hackable
- Ethical hacking: Stealthy network recon techniques
- Getting started in Red Teaming
- Ethical hacking: IoT hacking tools
- Ethical hacking: BYOD vulnerabilities
- Ethical hacking: Wireless hacking with Kismet
- Ethical hacking: How to hack a web server
- Ethical hacking: Top 6 techniques for attacking two-factor authentication
- Ethical hacking: Port interrogation tools and techniques
- Ethical hacking: Top 10 browser extensions for hacking
- Ethical hacking: Social engineering basics
- Ethical hacking: Breaking windows passwords
- Ethical hacking: Basic malware analysis tools
- Ethical hacking: How to crack long passwords
- Ethical hacking: Passive information gathering with Maltego
- Ethical hacking: Log tampering 101
- Ethical hacking: What is vulnerability identification?
- Ethical hacking: Breaking cryptography (for hackers)

Get certified and advance your career
- Exam Pass Guarantee
- Live instruction
- CompTIA, ISACA, (ISC)², Cisco, Microsoft and more!


