Pen Testing Domain Controllers

Introduction
When performing a penetration test, we're constantly stumbling upon various servers that support domain logins into the customers network. We're allowed to login if we know the username and password of an arbitrary account as well as the domain name. In this article we'll take a closer look how a domain login is actually implemented and what is happening behind the curtains when we're trying to authenticate to the domain.
Earn two pentesting certifications at once!
Enroll in one boot camp to earn both your Certified Ethical Hacker (CEH) and CompTIA PenTest+ certifications — backed with an Exam Pass Guarantee.
First, we must clarify some concepts to make the reader better understand the topic if he or she is not already familiar with it. First we must define a domain. A domain is basically a set of resources, like users, passwords, printers, etc that are managed by a domain controller. But why would we want to have a domain controller and a domain login to the system? It's because we want to store users, groups and their permissions on the same server. The key benefit of this is the fact that any user that is in the system can login to the arbitrary machine in the network with the same username and password. In a Windows environment, all the information is stored in an Active Directory (AD).
An AD domain controller authenticates and authorizes all users and computers in a Windows domain type network—assigning and enforcing security policies for all computers and installing or updating software. For example, when a user logs into a computer that is part of a Windows domain, Active Directory checks the submitted password and determines whether the user is a system administrator or normal user. Active Directory uses Lightweight Directory Access Protocol (LDAP), Kerberos and DNS [1].
A domain controller (DC) or network domain controller is a Windows-based computer system that is used for storing useraccount data in a central database. A domain controller in a computer network is the centrepiece of the Active Directory services that provides domain-wide services to the users, such as security policy enforcement, user authentication, and access to resources [2].
Domain controllers can greatly simplify the administration, since we can use it to grant ordeny access to resources in the network, such as printers, documents, and shared folders, with one single user account. By using the domain controller, a user can also get access to his personal resources like files on a Desktop from anywhere in the network; all he has to do is login with his existing user account.
The limitation of a domain controller that uses Active Directory is that only the computers running the Windows operating system are capable of using it. This means that if the AD is in place, the computers running operating systems like Linux, HP-UX, and Solaris won't be able to use the AD to authenticate. There is a solution, however. Instead of using the domain controller that uses Active Directory, we can now use Samba, which is open-source and not limited to Windows operating systems.
Because of the limitation in the domain controllers that uses Active Directory, we'll exclusively focus on the Samba domain controller in the sections that follow.
Turnkey: Samba Windows PDC
We can download an ISO image or an already functional vmdk virtual image from the Turnkey Linux Samba Domain Controller website. On the mentioned website, we can download a Samba-based Linux distribution that acts as domain controller. It supports netlogon, network attached storage for domain users, roaming profiles and PnP printing services and a web interface for configuring Samba and printing services [3].
I downloaded the provided vmdk virtual image, set-up it in Virtualbox and ran it. Upon booting, Linux will ask you for a root password as well as the AjaXplorer password. The AjaXplorer is just a web interface, which lets you access the files on your server directly from the web browser. We're not here to discuss that—we want to know more about the Samba domain controller.
Next, the system will ask us for a domain name, which we must fill out. We can see that on the picture below:
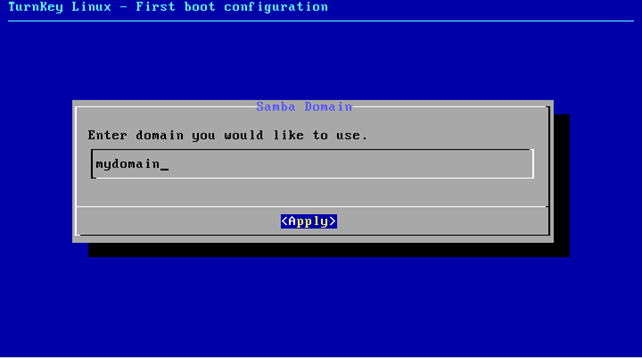
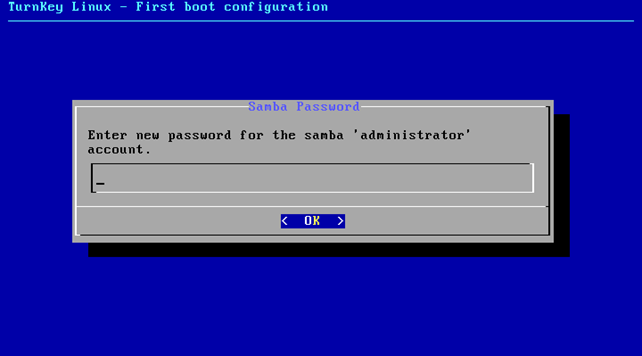
We've entered the domain name mydomain into the input box, which will set the domain we would like to be using. After that we also need to provide a new password for the samba administrator user:
Once we're finished with the configuration of the PDC, we need to reboot it, which will start a fresh domain controller on our network. After that, we can SSH to the domain controller with the root username and the password we've set during the configuration process. Once logged-in, we can display a list of open ports that we can connect to. We can do that with the netstat command like this:
[plain]
# netstat -luntp
Active Internet connections (only servers)
Proto Recv-Q Send-Q Local Address Foreign Address State PID/Program name
tcp 0 0 0.0.0.0:80 0.0.0.0:* LISTEN 960/lighttpd
tcp 0 0 0.0.0.0:22 0.0.0.0:* LISTEN 980/sshd
tcp 0 0 0.0.0.0:631 0.0.0.0:* LISTEN 929/cupsd
tcp 0 0 0.0.0.0:443 0.0.0.0:* LISTEN 960/lighttpd
tcp 0 0 0.0.0.0:12320 0.0.0.0:* LISTEN 869/shellinaboxd
tcp 0 0 0.0.0.0:12321 0.0.0.0:* LISTEN 1027/perl
tcp6 0 0 :::139 :::* LISTEN 986/smbd
tcp6 0 0 :::22 :::* LISTEN 980/sshd
tcp6 0 0 :::445 :::* LISTEN 986/smbd
We're connected through the SSH server, so we already know that port 22 is open. Additionally, the following ports are also open: 80 and 443 for web server, 631 for cups printing system, 12320 for shellinthebox server, 139 and 445 for windows shared folders and 12321 for Webmin. If we connect to the web server on either port 80 or 443, we'll see the TurnKey domain controller web interface as we can see below:
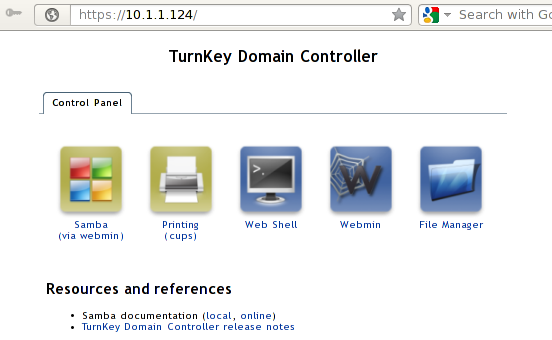
Depending on which icon we click, we'll be redirected to the appropriate server running on the already mentioned open ports. Currently we're interested in Samba, since we want to set-up a domain controller. When we click on the Samba icon on the picture above, we'll be redirected to the Webmin web interface accessible on the port 12321 as we can see below:
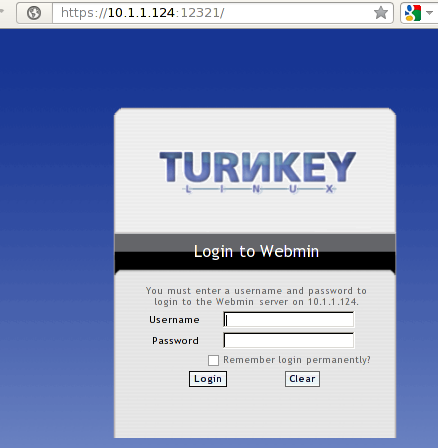
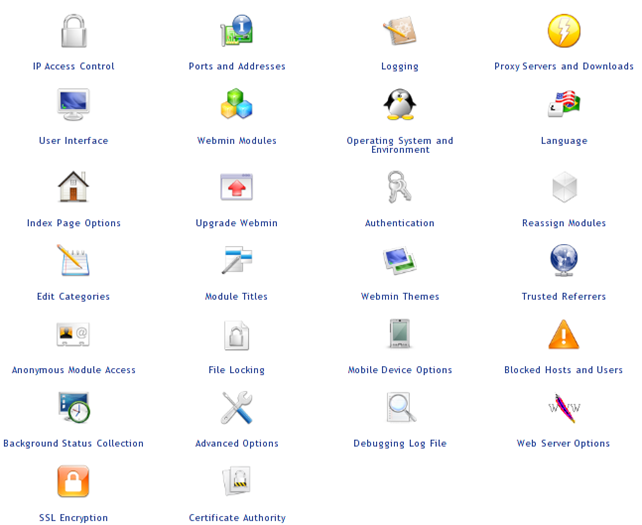
We need to login with the root username and password which was set during the configuration of the Turnkey Linux. Once we're successfully authenticated, we'll see a number of different settings that we can configure. We can see them on the picture below:
To join a domain, we need to go to our Windows client operating system and right-click on the My Computer icon and selecting Properties. After that we need to press on the "Change" button in the "Computer Name" category, which will gives us the option to change the computer name as well as join the domain.
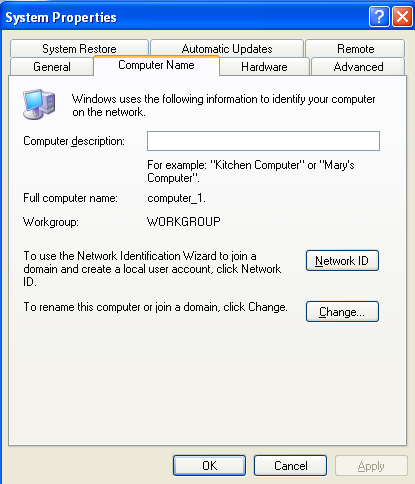
That can be seen on the picture below:
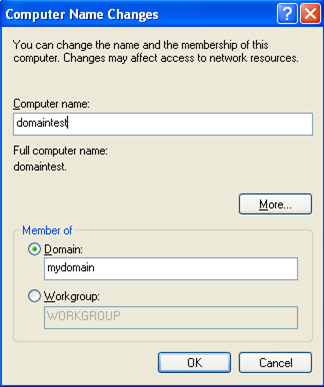
Once we click on the Change button, a new window will pop-up where we can actually change the computer name and join a domain. We can see that on the picture below where we specified domaintest as the new computer name and our previously configured domain mydomain.
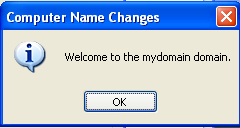
Once we have filled in the name of our computer and provided the domain in which we want to authenticate, we can press the OK button to save the settings. Another pop-up window will appear asking us for the username and password of the user configured in the domain. At this time, only the administrator user is configured, which has the password we've set-up in the configuration phase.
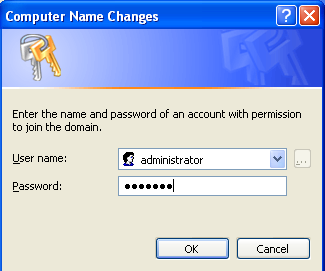
Once we've provided the right username and password, the system will have to reboot.
When we press the OK button, the system will restart and the changes will take effect. After the restart we'll have the option to choose our specified domain to authenticate the user to as can be seen on the picture below:
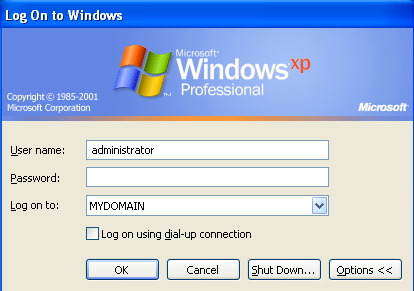
We again need to supply the right username administrator and the password to login to the system. Because we're logging-in for the first time, the Windows operating system will initialize a new computer user by configuring the most basic settings like Internet Explorer and Desktop. A part of the configuration process can be seen on the picture below:
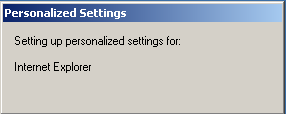
Once the initialization is done, we'll be logged into the system with our domain username and password. After that, we can open the command prompt and check whether we're actually part of the domain. We can do that with the "net localgroup /domain" command, whose result can be seen on the picture below:
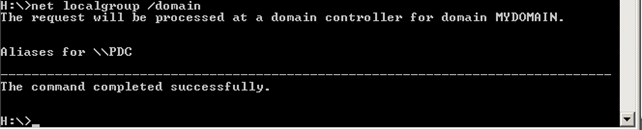
We can see that an active domain controller was returned and is accessible with the PDC domain name. If we ping PDC, we'll get appropriate IP resolution for the domain controller. We can get the same information by displaying the value of the LOGONSERVER variable like presented on the picture below:

The result is the PDC domain, which resolves to the 10.1.1.124, but we can do this after we're already logged in. Is there any way to figure out the address of domain controller when we're not authenticated?
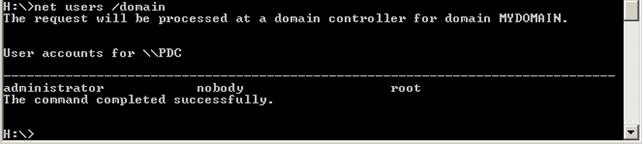
We can also list all users in a domain with the use of the "net users /domain" command, which result is presented on the picture below:
We can also port scan the domain controller to find out the open ports (remember that we already know that since we have access to the domain controller, but a hacker doesn't). The output of the nmap port scanning tool can be seen below:
[plain]
# nmap 10.1.1.124
Starting Nmap 5.51 ( http://nmap.org )
Nmap scan report for 10.1.1.124
Host is up (0.0023s latency).
Not shown: 994 closed ports
PORT STATE SERVICE
22/tcp open ssh
80/tcp open http
139/tcp open netbios-ssn
443/tcp open https
445/tcp open microsoft-ds
631/tcp open ipp
The NetBIOS Enumerator (nbtenum) program is then able to scan the network for interesting web services like SMB. When we start the nbtenum.exe program, we'll be presented with the following window:
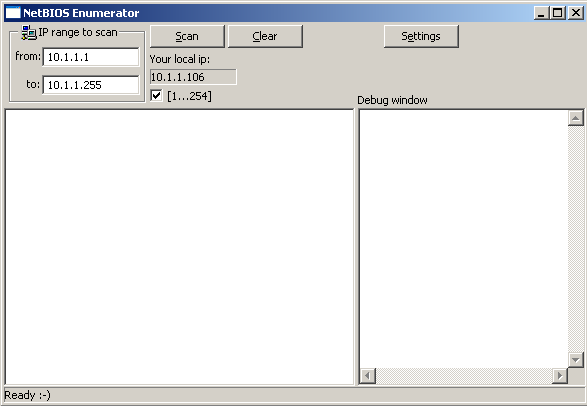
We can see that we specified the nbtenum to scan the entire IP range from 10.1.1.1-255. It detected that the IP Address 10.1.1.106 (our Windows box joined to the domain controller) and the IP Address 10.1.1.124 (our domain controller) have information available.
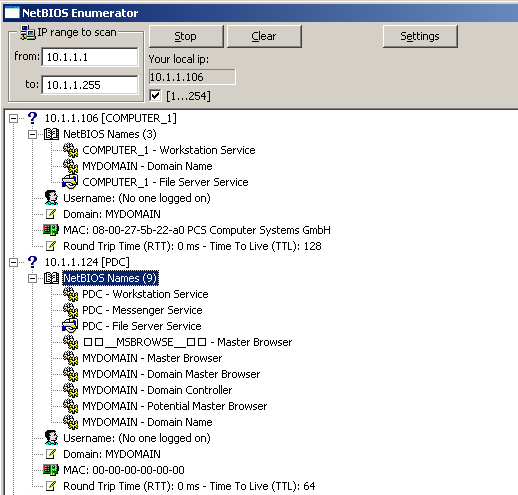
We can see that each IP address has a corresponding domain name. The IP address 10.1.1.106 has a domain name computer_1, while the domain controller 10.1.1.124 has a domain name pdc. We can also see that the domain controller has other services enabled.
Conclusion
We've seen that we can easily set-up a domain controller by using an already provided Turnkey Linux distribution to which we can authenticate from the Windows machines. We also got the default shared folder on the Linux Turnkey distribution for every user that authenticates to the domain controller. By using the domain controller, we can keep the user credentials in one place and provide our users with a default network drive where they can save their files that can be accessed from any other machine in the network (the hypothesis being that the user has previously authenticated against the domain controller successfully).
Finally, we've also seen how we can discover the domain controller and perform basic scanning functions on the local network for SMB shares.
References:
[1]: Active Directory, accessible on http://en.wikipedia.org/wiki/Active_Directory.
[2]: What Is a Domain Controller & What Does it Do, accessible on http://scientificera.com/windows/45-windows/224-what-is-a-domain-controller.html.

What should you learn next?
[3]: Domain Controller - Drop-in PDC replacement, accessible on http://www.turnkeylinux.org/domain-controller.
Enroll in an Ethical Hacking Boot Camp and earn two of the industry’s most respected certifications — guaranteed.
- CEH exam voucher
- PenTest+ exam voucher
- Exam Pass Guarantee
- Live online hacking training
In this Series
- Pen Testing Domain Controllers
- The rise of ethical hacking: Protecting businesses in 2024
- How to crack a password: Demo and video walkthrough
- Inside Equifax's massive breach: Demo of the exploit
- Wi-Fi password hack: WPA and WPA2 examples and video walkthrough
- How to hack mobile communications via Unisoc baseband vulnerability
- How to build a hook syscall detector
- Top tools for password-spraying attacks in active directory networks
- NPK: Free tool to crack password hashes with AWS
- Tutorial: How to exfiltrate or execute files in compromised machines with DNS
- Top 19 tools for hardware hacking with Kali Linux
- 20 popular wireless hacking tools [updated 2021]
- 13 popular wireless hacking tools [updated 2021]
- Man-in-the-middle attack: Real-life example and video walkthrough [Updated 2021]
- Decrypting SSL/TLS traffic with Wireshark [updated 2021]
- Dumping a complete database using SQL injection [updated 2021]
- Hacking clients with WPAD (web proxy auto-discovery) protocol [updated 2021]
- Hacking communities in the deep web [updated 2021]
- How to hack Android devices using the StageFright vulnerability [updated 2021]
- Hashcat tutorial for beginners [updated 2021]
- How to hack a phone charger
- What is a side-channel attack?
- Copy-paste compromises
- Hacking Microsoft teams vulnerabilities: A step-by-step guide
- PDF file format: Basic structure [updated 2020]
- 10 most popular password cracking tools [updated 2020]
- Popular tools for brute-force attacks [updated for 2020]
- Top 7 cybersecurity books for ethical hackers in 2020
- How quickly can hackers find exposed data online? Faster than you think …
- Hacking the Tor network: Follow up [updated 2020]
- Podcast/webinar recap: What's new in ethical hacking?
- Ethical hacking: TCP/IP for hackers
- Ethical hacking: SNMP recon
- How hackers check to see if your website is hackable
- Ethical hacking: Stealthy network recon techniques
- Getting started in Red Teaming
- Ethical hacking: IoT hacking tools
- Ethical hacking: BYOD vulnerabilities
- Ethical hacking: Wireless hacking with Kismet
- Ethical hacking: How to hack a web server
- Ethical hacking: Top 6 techniques for attacking two-factor authentication
- Ethical hacking: Port interrogation tools and techniques
- Ethical hacking: Top 10 browser extensions for hacking
- Ethical hacking: Social engineering basics
- Ethical hacking: Breaking windows passwords
- Ethical hacking: Basic malware analysis tools
- Ethical hacking: How to crack long passwords
- Ethical hacking: Passive information gathering with Maltego
- Ethical hacking: Log tampering 101
- Ethical hacking: What is vulnerability identification?
- Ethical hacking: Breaking cryptography (for hackers)

Get certified and advance your career
- Exam Pass Guarantee
- Live instruction
- CompTIA, ISACA, (ISC)², Cisco, Microsoft and more!


