Shared Folders with Samba and Qemu

In this tutorial we'll take a look at how we can install and configure the Samba server on a host operating system to create a shared folder, which the guest Qemu virtual machines can use.
The first thing we have to do is install Samba, which we can do with one of the following commands based on whichever Linux distribution we have:

Become a certified reverse engineer!
[plain]
# Gentoo
# Ubuntu
apt-get install samba
Configuration
After installing Samba, we have to configure it to allow sharing folders on the host computer. The configuration file can be found under /etc/samba/smb.conf and is divided into sections enclosed into brackets [ and ]. Any line starting with a semicolon ';' or hash '#' is a comment and doesn't do anything to guide the operation of Samba server except give us the description about what each option does.
The default configuration smb.conf has the following sections:
- [global]: global settings that are applied to every other section in the configuration file.
- [homes]: an example of a shared folder, which we can see when scanning a network.
- [printers]: an example configuration for sharing printing capabilities over the network.
The smb.conf has the following configuration options:
- user: the user authenticates with a username and password and the server checks whether the correct credentials were submitted. After that the user will be able to access and mount shares on the server.
- share: the user sends an authentication request with a password to access a certain share of the server, where the user has to authenticate for each share it wants to access.
- server: the user sends username and password to the Samba server, which in turn sends it to another server on the network, which checks for the validity of the credentials.
- domain: the user authenticates to the domain controller, which gives it access to the Samba server.
Lets take a look at how clients authenticate to Samba shares. At first Samba checks whether the share supports guest accounts and if it doesn't, the user must enter username and password to authenticate. When we use share security mode, we're effectively giving a share a password, which can enable every client that knows the password to connect to that share. If the share is guest only, the user is immediately given access to the share with the user rights as specified with the "guest account" configuration directive; there is no password checking being done. In user security mode, where each client must authenticate with its own username and password, which gives him access to the share. The server and domain security modes are effectively the same as user security mode, except that another server is used to prove whether the entered credentials were correct or not.
Note that when a user logs in to a Samba share, it must pass two levels of restriction. First, it must login with an existing username and password according to Samba. Second, it must also have permission to access to the directory according to the filesystem.
Samba also check the operating system users as well as the ones used with smbpasswd: we must keep this in mind when working with users with Samba. The only exception is the guest account, which we'll use in this tutorial.
Creating a Shared Folder
To create a shared folder, we much configure the "[homes]" configuration section in smb.conf configuration file. The first thing we can do is rename the share to whichever name we want, like "[shared]". Since we want the same shared folder as with VirtualBox, we need to use the share security mode, which gives us access to guest only share, which we can use without authenticating. To do that we need to use the following configuration option in the "[global]" section of smb.conf.
[plain]
security = share
We also need to add the "guest account" configuration option, which specifies the system account under which we'll have access to the share. In our case this is user nobody and the configuration option is seen below.
[plain]
guest account = nobody
Note that the user 'nobody' must be present on the system, which we can easily verify by grepping for the word 'nobody' when printing the contents of /etc/passwd file.
[plain]
# cat /etc/passwd | grep nobody
nobody:x:65534:65534:nobody:/var/empty:/bin/false
After that we only need to configure the share we would like to use. We need to specify the comment of the share, the path to the directory we would like to share and whether it's readable and writable. Configuration options like the ones below are in order:
[plain]
comment = Shared Folder
path = /home/user/shared
browseable = yes
guest ok = yes
guest only = yes
writable = yes
force user = nobody
force group = shared
create mask = 0770
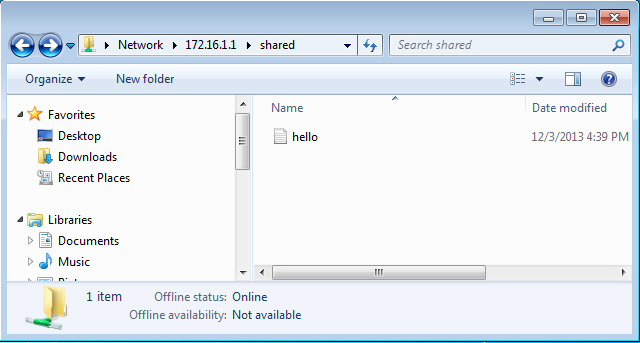
By declaring the share as guest only, we've effectively given access to any user connecting to it without entering a password. If we connect to the share now, it would present us with a shared folder without entering for username and password. On the picture below we can see the contents of the shared folder, which contains only the hello.txt text file.
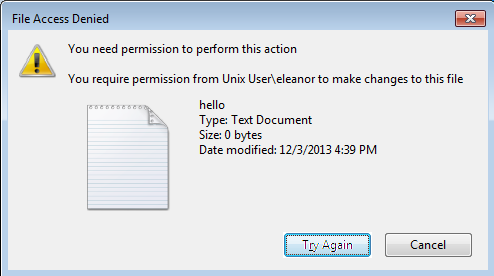
But because we're accessing the file as user nobody, we don't have permissions to write to the shared folder, which means we can't delete the hello.txt file. If we try to delete it nevertheless, the attempt will fail with a message that we don't have enough permissions to perform this action as seen below.
If we list the contents of the shared folder on the host operating system, we can see that only the user has write access to the file, but we're performing the action in the name of nobody.
[plain]
# ls -l shared
total 0
-rw-r--r-- 1 user user 0 Dec 3 16:39 hello.txt
In order to give both users access to the shared folder, we need to create another group named shared with groupadd command and add users 'user' and 'nobody' to that group. That can be achieved with the commands seen below.
[plain]
# groupadd shared
# gpasswd -a user shared
# gpasswd -a nobody shared
After that we need to change the group of the files in the shared directory to shared and chmod 770 to give read and write access to both users on the system.
[plain]
# chown -R nobody:shared /home/user/shared
# chmod 770 /home/user/shared
After that you should be able to delete the files in the shared folder.
Configured smb.conf
For completeness, I've presented my whole smb.conf configuration file below, where I've deleted all the comments and empty lines to make it easier to read.
[plain]
|global|
workgroup = WORKGROUP
server string = Samba
security = share
load printers = no
guest account = nobody
log file = /var/log/samba/log.%m
max log size = 50
interfaces = br0
|shared|
comment = Shared Folder
path = /home/user/shared
browseable = yes
guest ok = yes
guest only = yes
writable = yes
force user = nobody
force group = shared
create mask = 0770
Conclusion
In this article we've looked at how we can setup a shared folder and use it in Qemu. Basically it has little to do with Qemu; the only thing we need to worry about is the "interfaces" option in smb.conf. In my case it's set to br0, which instructs Samba to bind on bridge br0 interface where my virtual machines are located.

Once more thing to note. On newer versions of Samba, the share security mode is deprecated, which is why you should use the following two options instead: "security = user" and "map to guest = Bad User"; other than that you don't have to change any of the settings in the smb.conf configuration file.
- Exam Pass Guarantee
- Live expert instruction
- Hands-on labs
- CREA exam voucher
In this Series
- Shared Folders with Samba and Qemu
- Kali Linux: Top 8 tools for reverse engineering
- Stacks and Heap
- Top 8 reverse engineering tools for cyber security professionals [updated 2021]
- Arrays, Structs and Linked Lists
- Reverse engineering obfuscated assemblies [updated 2019]
- Crack Me Challenge Part 4 [Updated 2019]
- Writing windows kernel mode driver [Updated 2019]
- Assembly programming with Visual Studio.NET
- The basics of IDA pro
- Reverse engineering tools
- Hacking tools: Reverse engineering
- Reverse engineering a JavaScript obfuscated dropper
- Reverse Engineering – LAB 3
- Exploiting Protostar – Stack 0-3
- Reversing Binary: Spotting Bug without Source Code
- Reverse engineering virtual machine protected binaries
- Introduction to Reverse Engineering
- Pafish (Paranoid Fish)
- Extending Debuggers
- Encrypted code reverse engineering: Bypassing obfuscation
- Buffer Overflow Attack & Defense
- Invoking Assembly Code in C#
- iOS Application Security Part 32 - Automating tasks with iOS Reverse Engineering Toolkit (iRET)
- Hooking IDT
- A Guide to Debugging Android Binaries
- Kernel debugging with Qemu and WinDbg
- Testing Hooks via the Windows Debugger – An Introduction to RevEngX
- Reverse Engineering with Reflector
- Applied Reverse Engineering with IDA Pro
- Injecting spyware in an EXE (code injection)
- Disassembler Mechanized Part 4: DLL Injector Development
- Disassembler Mechanized Part 3: Code Injection Operation
- Debugging TLS callbacks
- Disassembler Mechanized Part 2: Generating C# and MSIL code
- System address map initialization in x86/x64 architecture part 2: PCI express-based systems
- Coding of Disassembler
- Applied cracking & byte patching with IDA Pro
- .NET reversing with Reflexil
- Reversing firmware part 1
- Reverse Engineering with Reflector: Part 1
- Remoting Technology
- Reverse engineering with OllyDbg
- Understanding Session Fixation
- Optimizing Managed Code Execution
- File system manipulation
- The BodgeIt store part two
- The BodgeIt store part one
- Understanding Windows Internal Call Structure
- Pin: Dynamic Binary Instrumentation Framework
- Linux Kernel Development Process

Get certified and advance your career
- Exam Pass Guarantee
- Live instruction
- CompTIA, ISACA, (ISC)², Cisco, Microsoft and more!

Reverse engineering
Reverse engineering
Reverse engineering
Top 8 reverse engineering tools for cyber security professionals [updated 2021]
Reverse engineering