Using Mobile Devices for Hacking

Objective:
The following lab will instruct you in booting a live version of Android. Using this live version of Android this lab will walk you through the steps to use an app called QPython to enumerate a telnet server service on the local network, then brute force attack that service.
Requirements:
WindowsServer2012R2_v5 VM
Santoku VM

11 courses, 8+ hours of training
Android_x86.iso
Lab_Files.iso
File 1: https://www.dropbox.com/s/beucssfy54fiehk/android_x86.iso?dl=0
File 2: https://www.dropbox.com/s/04mlu2qa8o1d64t/Lab_Files.iso?dl=0
Phase 1. Booting Android
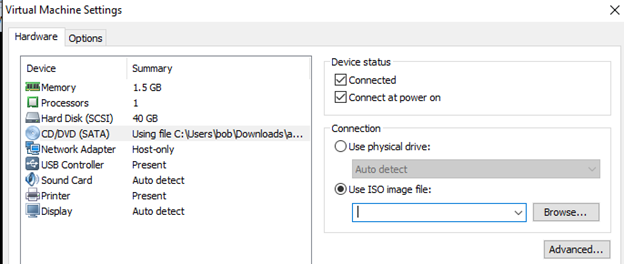
First, we need to mount the "Android_x86.iso" on the Santoku VM.
Rick click on the Santoku VM in the Library and Choose Settings. Select "CD/DVD (SATA), and then click browser to locate the "Android_x86.iso."
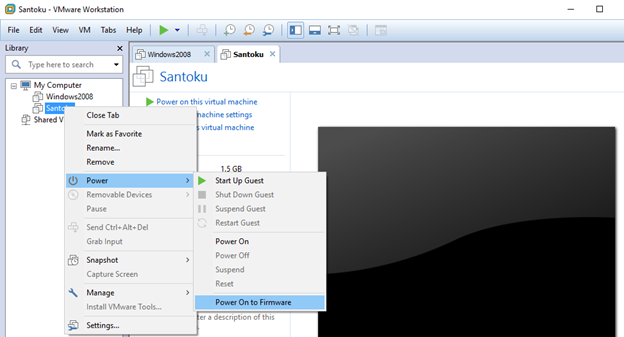
Power on the Santoku Virtual Machine directly to firmware by right clicking on the VM in the library pane:
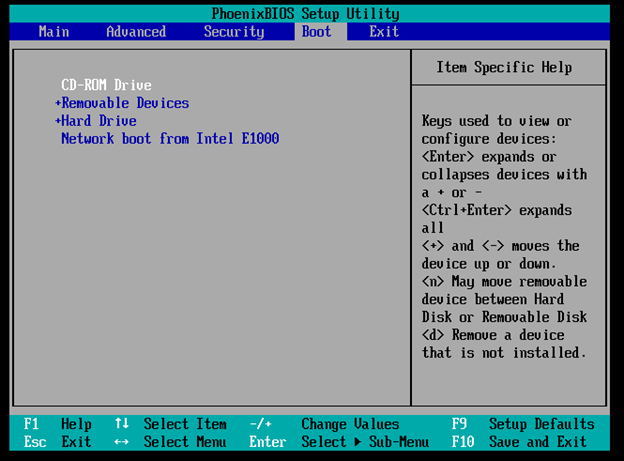
Scroll over to the Boot Tab and use the "+" and Shift key to move the CD-ROM Drive option to the top of the list. Then press F10 to save and exit.
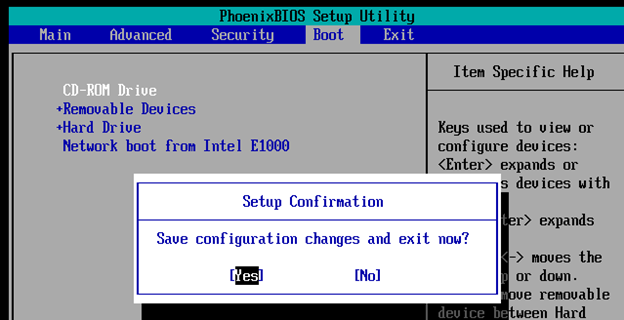
Select "Yes" and press enter to save and reboot:
The system boots to the Android x86 cd. Press enter to book the CD in Live mode:

The System Boots into Android:

The Welcome Screen appears. Click "OK" twice to get through the menus.

Phase 2. Disable Screen Timeout
Click the button to open the App Drawer:

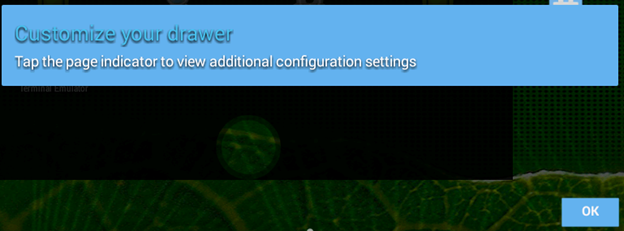
Click ok to close the "Customize your Drawer" Notification:
Click the "Settings Icon" to open the device settings. Then click "Display" to open the screen settings:

Set the Sleep to "Never time out":

Press the "Home" Button to return to the desktop.
Phase 3. Getting IP information
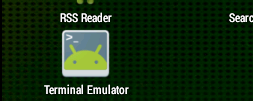
You will need the IP address of the VM running Android. Go back into the App Drawer and open up the "Terminal Emulator" app.
From within this app Type in the command: "ifconfig eth0" and then press enter:
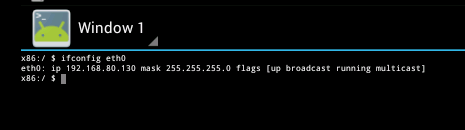
Copy down the IP address. In the above example, the IP address is 192.168.80.130, but yours may or may not be something different.
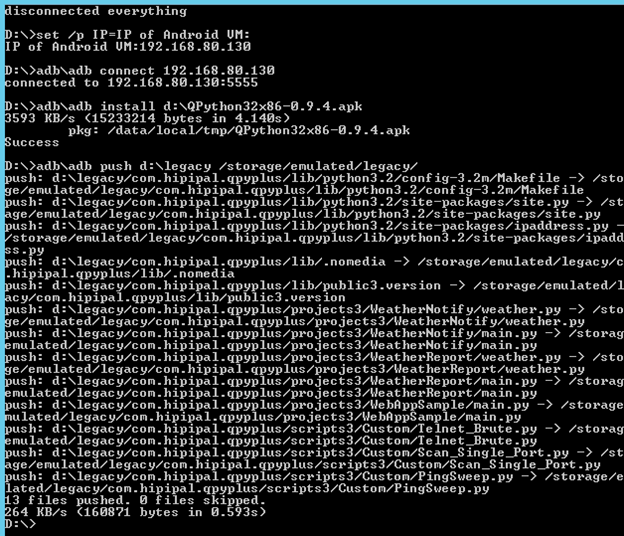
Phase 4. Pushing Files from Windows Server with ADB
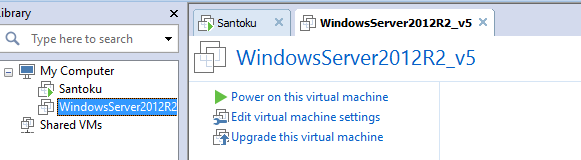
Leave the Android system as it is and go back to the VMWare Workstation Console to start your Windows Server 20012R2 VM.
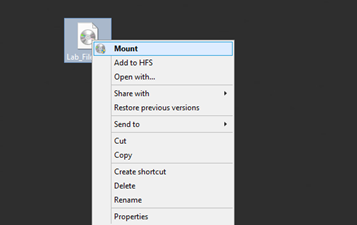
Once the Windows Server 2008 VM boots, locate the "Lab_Files.iso" file provided by your instructor. "Right Click" on the file and select "mount" to mount the drive.
Once mounted the drive will open in the file explorer. Note the drive letter for the next step.
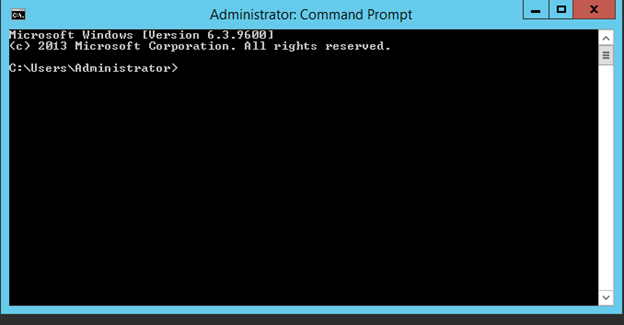
Double click the "Command Prompt" icon on the desktop to open a command prompt.
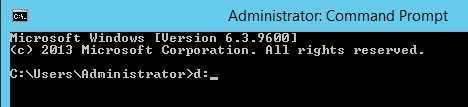
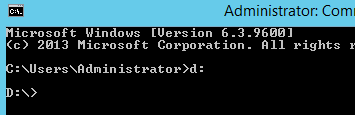
Change to the drive that your ISO file mounted by issuing the command: "d:" (where "d" is the drive letter on your system at the prompt as pictured below, and press enter.
Issue a "dir" command to see the files and folders on the drive. (The ISO you mounted)

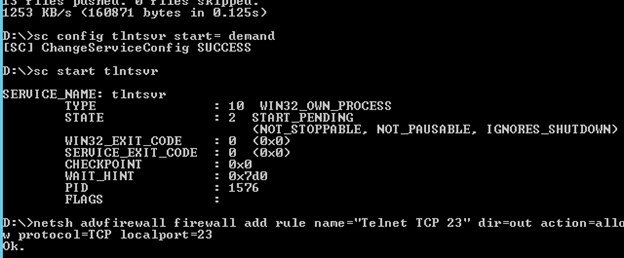
Runthis.bat is a file that would not ordinarily be on a system. Runthis.bat is a batch script that sets up this particular lab for students. Runthis.bat performs actions that are outside of the scope of the lab such as; setting up a telnet server, and using ADB to install packages. Runthis.bat is needed because the Android environment in this lab is running live, and nothing can be saved to it. The intent of Runthis.bat is to allow students to focus on hacking systems with Android and not be bogged down by manually completing the following tasks.
Runthis.bat issues the following commands.
- Asks for the IP of the Android VM
- Connects to the Android VM.
- Install Qpython on the Android VM
- Copies scripts for Qpython to the Android VM
- Enables & Starts the Telnet Service.
- Opens Port 23 on the Windows Firewall for Telnet.
- Reduces security on the telnet server to mimic a poorly secured telnet server. (Server 2012's Telnet server is more secure than most Cisco routers/switches and Linux based telnet servers by default.)
In the command prompt type "runthis.bat" and press enter.

The Script starts by asking for the IP address of the Android VM. Type in the IP address you copied down earlier, and then press enter.

You should see the following output.
And
If you didn't see the output above, try running runthis.bat again, and double check the IP address of the Android VM and connectivity with ping.
Finally, check the IP address of the Windows Server 2012R2 VM by issuing the command "ipconfig."
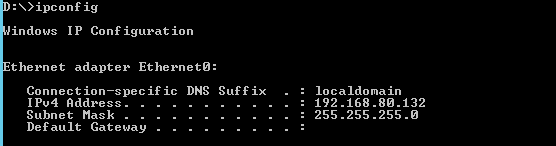
Copy down the IPv4 Address (in this case 192.168.80.132)
Phase 5. Running Scripts
Go back the VM Running Android. Open the App Drawer and start the QPython3 App.

Once QPython3 opens click on the scripts icon to open the scripts interface.
Down at the bottom of the scripts folder is another folder called "Custom" click there to open the Custom folder.

The Custom folder contains four scripts that we are going to use to enumerate hosts, enumerate services, and brute force telnet.
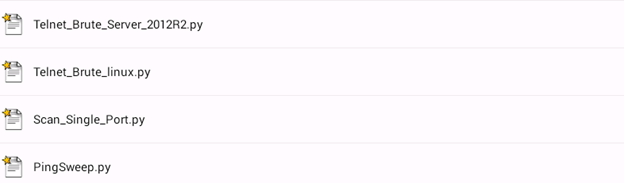
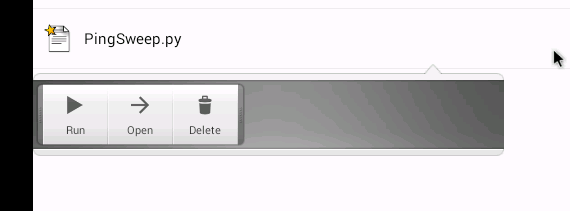
Start by clicking on "PingSweep.py" and selecting "Run".
The Script automatically starts and begins pinging every host on the subnet the Android system is connected to.
When The Script Finishes it prints out all the hosts that were found online by the ping sweep.
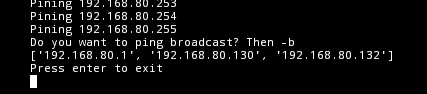
(Here you can see 192.168.80.1, 192.168.80.130, and 192.168.132 your results may be different. At the very least you should see the IP of the Windows Server 2012R2 VM.)
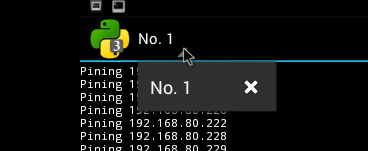
For the purpose of this Lab, we know what system we want to. The IP address of the Windows Server 2012R2 that you copied earlier, and it should be on the list.
To close this script, click in the upper left corner next to "No.1", and click the "x" that appears.
Now you know your host is online; it is time to scan to see if there is a telnet server listening.
The next script to run is the "Scan_Single_Port.py" script. This script will ask you what Port you want to scan for and scan all hosts in the subnet the VM Running Android is connected to. Be sure to enter in "23" to scan for the telnet service. Launch the script the same way we launched the previous script by clicking on it and pressing "Run".

Notice In this example I entered "23" for the port. Then Press enter to run the scan. The Scanner will print the hosts that it finds listening on port 23.

You should see the IP of your Server 2012R2 VM.
Next, we want to attempt a simple Brute Force of that Telnet Service. Exit the script by hitting enter or closing as we did the previous script.
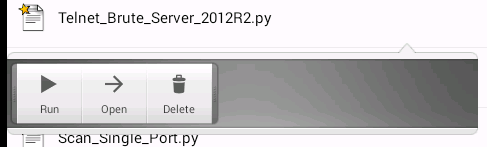
Click on the "Telnet_Brute_Server_2012R2.py" script but instead of running the script click on "Open". (Windows Telnet operates differently than Linux and Cisco, there are multiple Scripts. Our Client is a Windows server.)
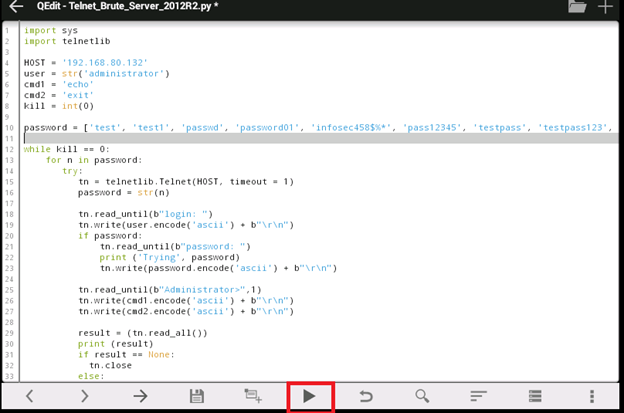
The Script will open in an editor. You need to specify the IP address of the system you want to brute force attack.

Change the "HOST" variable to match the IP of the Server you are attacking. The Windows Server 2012R2 VM. (In this example 192.168.80.132)
Other interesting things to note from this screenshot and the script itself are the "user" variable is set to "administrator", and the "password" list. The password list is short but will work just fine for this proof of concept lab.
If you have issues you may need to adjust the following timeout values: (Both 1's are timeout values)


Once you have changed the IP address, click on the play button on the bottom of the screen to run the script.
The script will execute a brute force against the target, and the output should look similar to the following:

We are now able to Ping sweep a network, scan a network for ports, and brute force telnet servers all from a mobile device running Android.
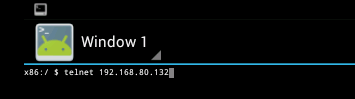
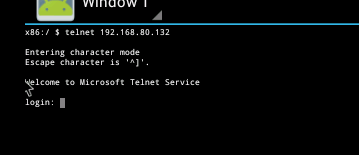
Now that you have the Telnet Password for the server you can log into it with a telnet client. Go back to the Android Terminal
From inside the terminal connect to the Windows Server 2008 VM with telnet by issuing the following command: telnet "ip" (where IP is the address of the Windows Server 2008 VM)
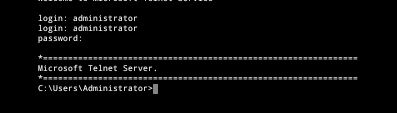
Once the prompt displays; type in the username of "Administrator."
Once the password prompt displays, type in the password that we know is correct for the administrator account from out brute force attempt: infosec458$%*
Now add a user account to prove you have administrative access to the server.
Issue the command: net user hacker01 P@ssw0rd /ADD (hacker01 is the username and P@ssw0rd is the password for the new account)

11 courses, 8+ hours of training
If the command completes successfully, you know you truly have administrative access and have brute forced the administrative account on the server.
In this Series
- Using Mobile Devices for Hacking
- DevSecOps: Moving from “shift left” to “born left”
- What’s new in the OWASP Top 10 for 2023?
- DevSecOps: Continuous Integration Continuous Delivery (CI-CD) tools
- Introduction to DevSecOps and its evolution and statistics
- MongoDB (part 3): How to secure data
- MongoDB (part 2): How to manage data using CRUD operations
- MongoDB (part 1): How to design a schemaless, NoSQL database
- Understanding the DevSecOps Pipeline
- API Security: How to take a layered approach to protect your data
- How to find the perfect security partner for your company
- Security gives your company a competitive advantage
- 3 major flaws of the black-box approach to security testing
- Can bug bounty programs replace dedicated security testing?
- The 7 steps of ethical hacking
- Laravel authorization best practices and tips
- Learn how to do application security right in your organization
- How to use authorization in Laravel: Gates, policies, roles and permissions
- Is your company testing security often enough?
- Authentication vs. authorization: Which one should you use, and when?
- Why your company should prioritize security vulnerabilities by severity
- There’s no such thing as “done” with application security
- Understanding hackers: The insider threat
- Understanding hackers: The 5 primary types of external attackers
- Want to improve the security of your application? Think like a hacker
- 5 problems with securing applications
- Why you should build security into your system, rather than bolt it on
- Why a skills shortage is one of the biggest security challenges for companies
- How should your company think about investing in security?
- How to carry out a watering hole attack: Examples and video walkthrough
- How cross-site scripting attacks work: Examples and video walkthrough
- How SQL injection attacks work: Examples and video walkthrough
- Securing the Kubernetes cluster
- How to run a software composition analysis tool
- How to run a SAST (static application security test): tips & tools
- How to run an interactive application security test (IAST): Tips & tools
- How to run a dynamic application security test (DAST): Tips & tools
- Introduction to Kubernetes security
- Key findings from ESG’s Modern Application Development Security report
- Microsoft’s Project OneFuzz Framework with Azure: Overview and concerns
- Software maturity models for AppSec initiatives
- Best free and open source SQL injection tools [updated 2021]
- Pysa 101: Overview of Facebook’s open-source Python code analysis tool
- Improving web application security with purple teams
- Open-source application security flaws: What you should know and how to spot them
- Android app security: Over 12,000 popular Android apps contain undocumented backdoors
- 13 common web app vulnerabilities not included in the OWASP Top 10
- Fuzzing, security testing and tips for a career in AppSec
- 14 best open-source web application vulnerability scanners [updated for 2020]
- 6 ways to address the OWASP top 10 vulnerabilities
- Ways to protect your mobile applications against hacking

Get certified and advance your career
- Exam Pass Guarantee
- Live instruction
- CompTIA, ISACA, (ISC)², Cisco, Microsoft and more!

Application security
Application security
Application security
DevSecOps: Continuous Integration Continuous Delivery (CI-CD) tools
Application security