Lab: GPG

In this lab, we will get an introduction to the GnuPG, the GNU Privacy Guard, an open source implementation of PGP. One problem with public key encryption is how to trust a public key. A hacker can easily spoof his identity; appear to be a legitimate user, publish his public keys on the Internet under legitimate user's alias, and get encrypted messages for the user and decrypt the message using his private key. If the hacker is smart enough, the legit user will be uninformed about the attack. There have been two solutions used in the public domain to this. First one is to use a public key infrastructure with a certification authority hierarchy which will be responsible for issuing keys, revoking keys and providing key certificates. The second one, used by the PGP standard and automatically by the GPG, is to create a web of trust. The simple trick of web of trust is enticing, herein, an inherent trust between two parties is used to sign the keys. For example- Alice, trusting Bob, can sign his public key which is generated and published on the internet by Bob himself. Naturally, Bob will have a group of people who trust him. If all of them sign his key, then, naturally, a person who has not signed his key will see that Bob's key has built enough trust by looking at a number of signatures Bob's public key has and send him the message by encrypting messages using Bob's public key.
Step 1: Generating Keys:
In every Linux distribution, including Kali Linux, you will get an inbuilt set of GPG tools. To generate keys, type the following command.

11 courses, 8+ hours of training
gpg --gen-key
Upon typing this command, we have to select different options we want for the key. The first option is default. We will be using RSA and RSA keys. This screenshot is in the figure below:
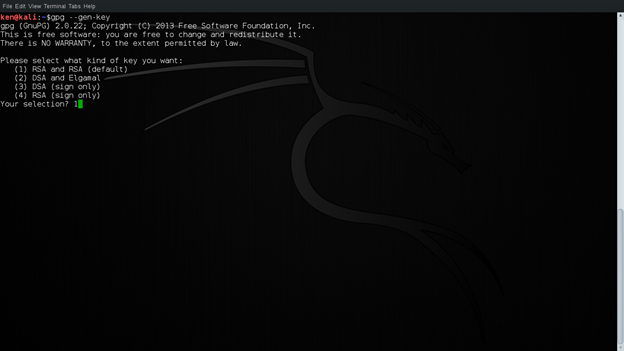
Figure 1: Selection of Key
Next step is to select the length of the key. The key can be anywhere from 1024 bits to 4096 bits, 2048 being the default. For this lab, we will be using 2048 bit long key. After that, we have to select the expiry of the key. If we use 0, the key will not have an expiry date. After that, we have to select whether the selection is valid or not. Select y now:
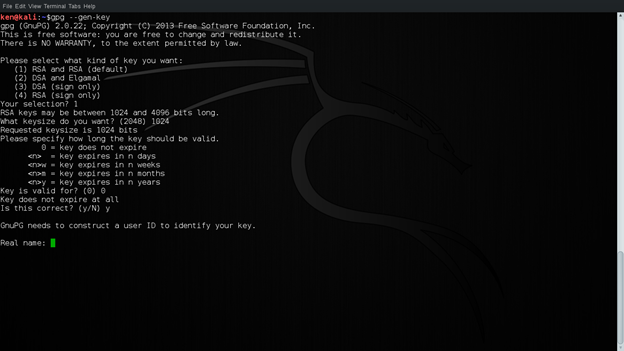
Figure 2: Selecting Key Preferences
Now, we have to enter our identity, which will be used for records in the key. In practice, it is important to use real credentials for this. For now, we will be using the following credentials shown in the screenshot below. This will be used to generate user id for the key. Now that we have a user ID, we select O to generate key now.
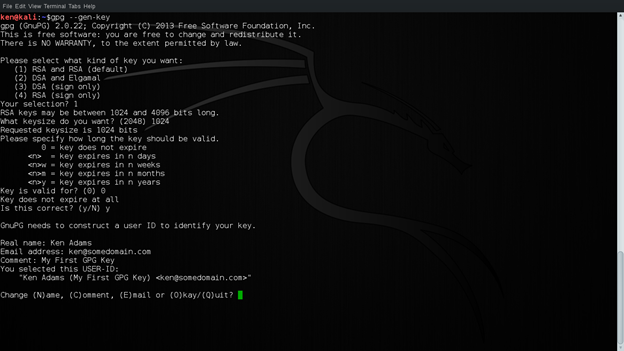
Figure 3: Constructing User ID
Now, we have to enter the passphrase for our key. This will be the alias for our private key. It is impossible to remember the 1024 bits long key. So, using this passphrase we access our private key. This passphrase should be strong and should be easy to remember. Forgetting this will lead to having no key. Make sure to enter correct passphrase both times. This is shown in the screen shot below:
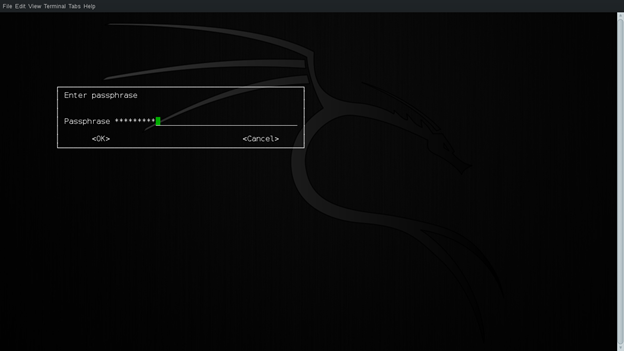
Figure 4: Passphrase for the key
After you correctly enter the passphrase for your key, give the GPG engine a chance to generate your key. As this needs the generation of a lot of random bytes, a good idea would be to be busy with some other things in your OS.
Step 2: Encrypting and Decrypting Messages:
Now that we have generated the keys, let us encrypt and decrypt messages using our key. Let us make a text file example.txt using vim and paste some text there and encrypt it.
vim example.txt
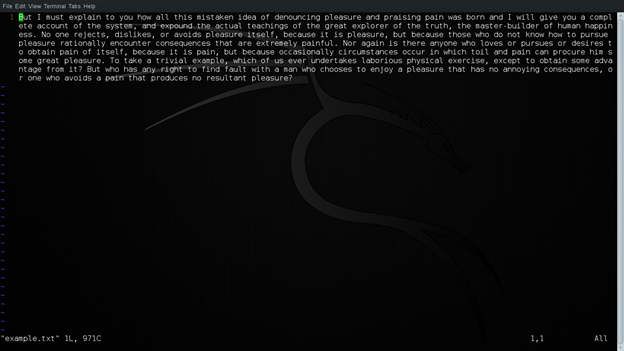
Figure 5: example.txt
Now, to encrypt this message, we will be using the following command. It is encrypted using Ken's public key that is available. The recipient here is also Ken. The output file is example.gpg.
gpg --output example.gpg --armor --encrypt --recipient Ken example.txt
Now let us look at example.gpg and this is what it looks like: This is seen using the cat command.
cat example.gpg
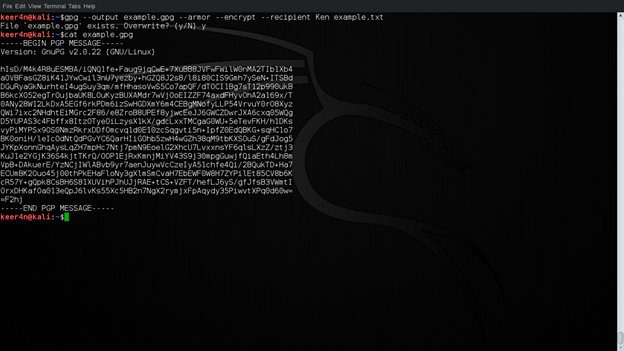
Figure 6: Encrypted file
Now let us decrypt the message using ken's public key. Remember, in order to decrypt this message, we need to access Ken's private key. This should be accessible using a passphrase that was set during key generation. Decryption is done using the following command. The decrypted file is an example. The output file is viewed using cat example.
gpg --output example --decrypt example.gpg
This is shown in the figure below:
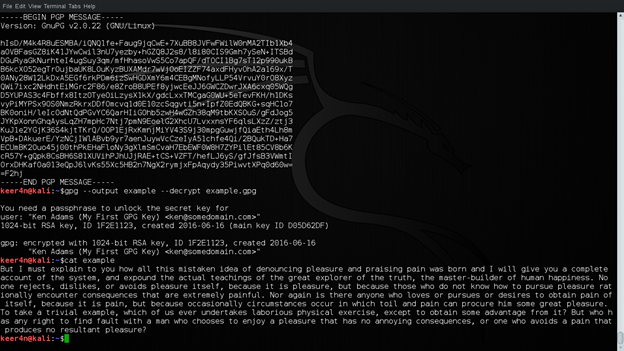
Figure 7: Decrypting Message
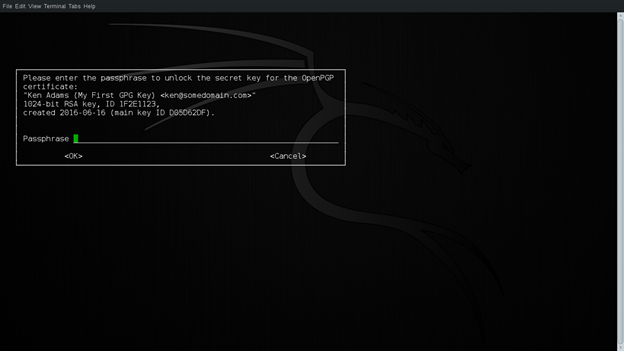
Figure 8: Entering Passphrase
Step 3: Signing With Private Keys
Next up, let us get an insight on digital signatures. Now, the concept of digital signatures is opposite in sense of the use of keys. Here, the signature is provided using user's private key (and a passphrase is required). Here, we will sign the example.txt using Ken's key. This is done using the following command:
gpg --example.sig --default-key Ken --sign example.txt
The output is example.sig. This is shown in the figure below:
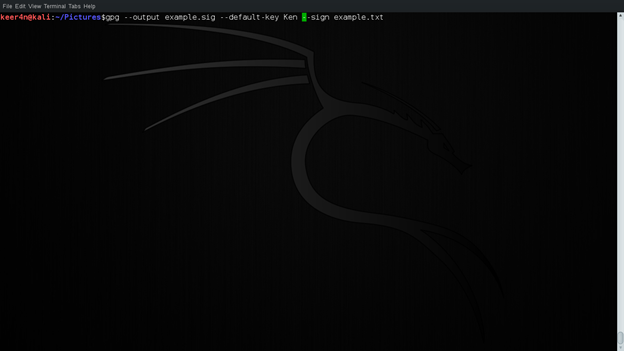
Figure 9: Digital Signature
Now let us view example.sig. This is viewed using cat.
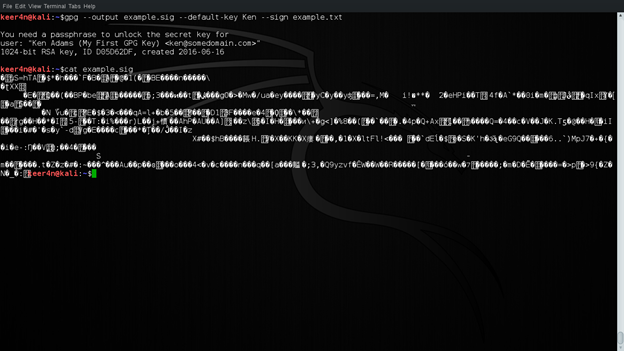
Figure 10: Viewing the signed file
Now, there's a problem. This file is not legible. This is due to compression followed by a signature.
Now if we want a decompressed version, we can use the following command. Remember the file example that was decrypted in step 2 which we will be using for asserting Ken's signature. The output file is example.cls
gpg --output example.cls --default-key Ken --clearsign example
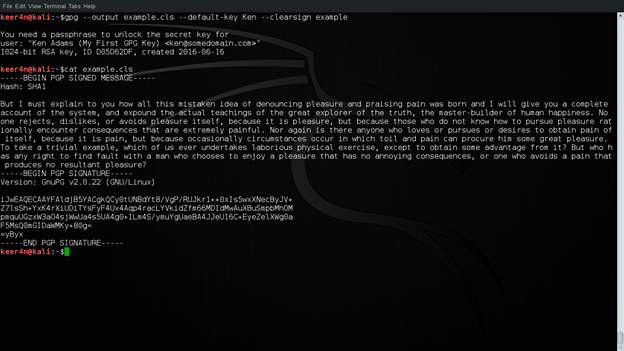
Figure 11: Making signature clearly legible
Now let us verify the signature. This is done using the following command:
gpg --verify example.cls
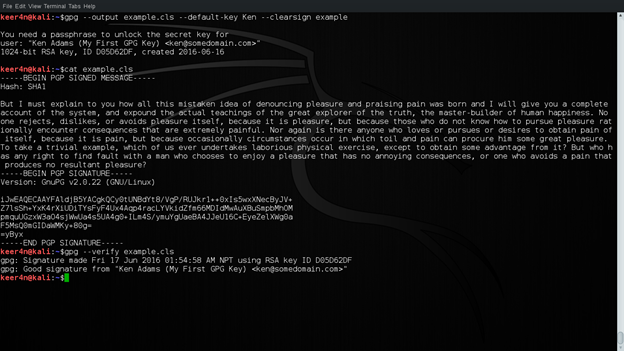
Figure 12: Verifying Signature
Step 4: Key Revocation and Revocation Certificate Generation:
Now, let us revoke the key. This might be necessary whenever the key is compromised. We will revoke Ken's key now. The steps are straight forward. This is done using the following command.
gpg --output revoke.asc --gen-revoke Ken
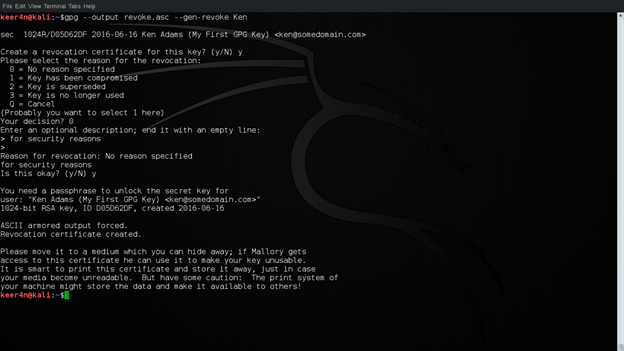
Figure 13: Key Revocation
Now let us view the revocation certificate.
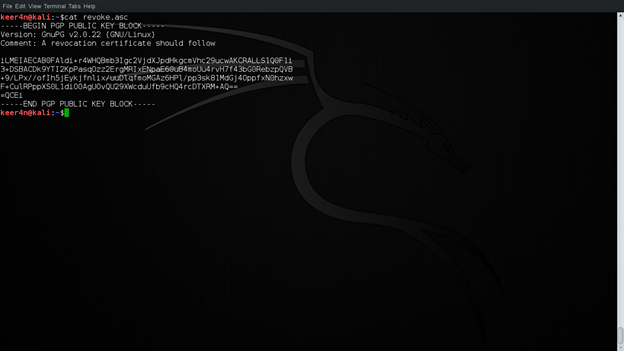
Figure 14: Revocation Certificate
It is a good idea to have this certificate in print or saved to some file. This will give you more options if you forget the passphrase or when your key has been compromised.
Step 5: Using the Revoked Key:
Now that we have a revocation certificate, will it affect the operation of our key in any way? The answer is NO. We only have a revocation certificate now, which is not published or imported to have an impact on our public-private key pair. Let us import the revocation certificate to our key now.
This is done using the following command (revoke.asc is the revocation certificate created from the previous step):
gpg --import revoke.asc
Issuing this command imports the revocation into your keyring, revoking your key. This is shown in the first line of the key and shown in figure 16 below:
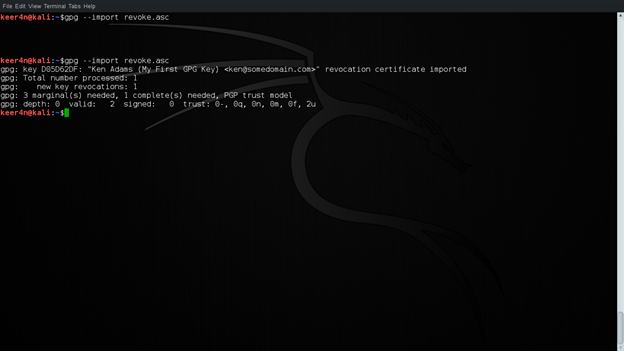
Figure 15: Revoking a Key
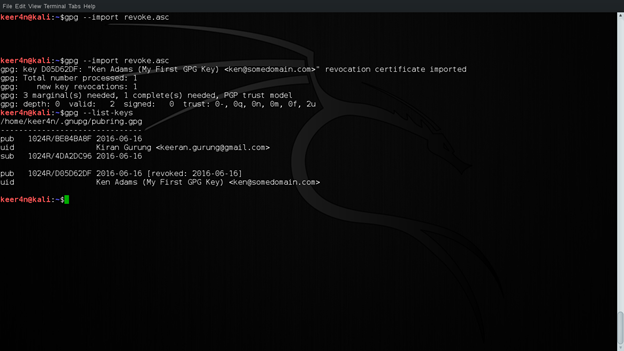
Figure 16: Key Status list
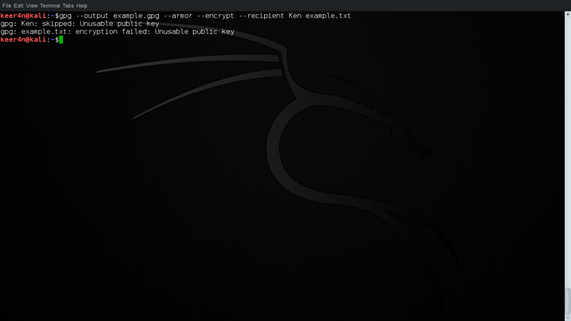
Now that the key has been revoked let us try and encrypt a message as we did in step 2. What happened? Why are we still getting the encrypted file? We have revoked the key, right? It is not possible to encrypt the message using Ken's public key because it is unusable. This is shown in figure 17 below.
11 courses, 8+ hours of training
Figure 17: Encryption after Revocation
Learn how to secure systems with 11 courses from Infosec Skills instructor and #1 best-selling author Ted Harrington.
- Hack your system
- Establish your threat model
- Spend wisely
- And more
In this Series
- Lab: GPG
- DevSecOps: Moving from “shift left” to “born left”
- What’s new in the OWASP Top 10 for 2023?
- DevSecOps: Continuous Integration Continuous Delivery (CI-CD) tools
- Introduction to DevSecOps and its evolution and statistics
- MongoDB (part 3): How to secure data
- MongoDB (part 2): How to manage data using CRUD operations
- MongoDB (part 1): How to design a schemaless, NoSQL database
- Understanding the DevSecOps Pipeline
- API Security: How to take a layered approach to protect your data
- How to find the perfect security partner for your company
- Security gives your company a competitive advantage
- 3 major flaws of the black-box approach to security testing
- Can bug bounty programs replace dedicated security testing?
- The 7 steps of ethical hacking
- Laravel authorization best practices and tips
- Learn how to do application security right in your organization
- How to use authorization in Laravel: Gates, policies, roles and permissions
- Is your company testing security often enough?
- Authentication vs. authorization: Which one should you use, and when?
- Why your company should prioritize security vulnerabilities by severity
- There’s no such thing as “done” with application security
- Understanding hackers: The insider threat
- Understanding hackers: The 5 primary types of external attackers
- Want to improve the security of your application? Think like a hacker
- 5 problems with securing applications
- Why you should build security into your system, rather than bolt it on
- Why a skills shortage is one of the biggest security challenges for companies
- How should your company think about investing in security?
- How to carry out a watering hole attack: Examples and video walkthrough
- How cross-site scripting attacks work: Examples and video walkthrough
- How SQL injection attacks work: Examples and video walkthrough
- Securing the Kubernetes cluster
- How to run a software composition analysis tool
- How to run a SAST (static application security test): tips & tools
- How to run an interactive application security test (IAST): Tips & tools
- How to run a dynamic application security test (DAST): Tips & tools
- Introduction to Kubernetes security
- Key findings from ESG’s Modern Application Development Security report
- Microsoft’s Project OneFuzz Framework with Azure: Overview and concerns
- Software maturity models for AppSec initiatives
- Best free and open source SQL injection tools [updated 2021]
- Pysa 101: Overview of Facebook’s open-source Python code analysis tool
- Improving web application security with purple teams
- Open-source application security flaws: What you should know and how to spot them
- Android app security: Over 12,000 popular Android apps contain undocumented backdoors
- 13 common web app vulnerabilities not included in the OWASP Top 10
- Fuzzing, security testing and tips for a career in AppSec
- 14 best open-source web application vulnerability scanners [updated for 2020]
- 6 ways to address the OWASP top 10 vulnerabilities
- Ways to protect your mobile applications against hacking

Get certified and advance your career
- Exam Pass Guarantee
- Live instruction
- CompTIA, ISACA, (ISC)², Cisco, Microsoft and more!

Application security
Application security
Application security
DevSecOps: Continuous Integration Continuous Delivery (CI-CD) tools
Application security