Automation Unit Testing with NUnit

NUnit GUI
Nunit.exe latest version 2.6 can download from here: http://nunit.org/index.php?p=download.

The installation process hardly takesa few minute to be completed once the executable is downloaded. The NUnit graphical user interface looks like as following after the installation process is complete.
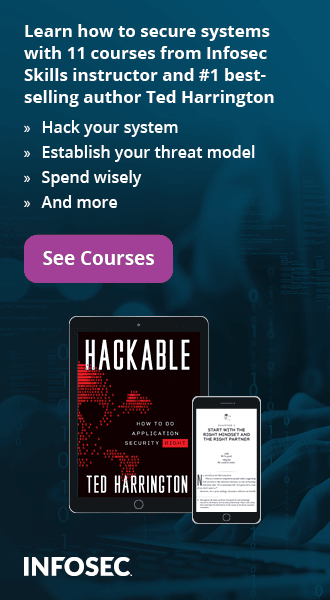
[caption id="" align="alignnone" width="530"] Figure 1.1 NUnit GUI[/caption]
After launching the NUnit.exe GUI, it is time to open a project in form of a DLL or EXE file on which all the test cases will be executed. For that purpose go to File menu and select Open Project, now choose the Test case DLL or EXE file and Unit Test case process is ready to execute as following;
[caption id="" align="alignnone" width="524"] Figure 1.2 NUnit Project Loading[/caption]
NUnit Testing Framework
NUnit is a unit testing framework for .NET applications, where the entire application is isolated into diverse modules and each module is tested independently to ensure whether or not the objective is met. The NUnit Framework caters a range of attributes that are used during unit tests. They are used to define Test Fixtures, Test methods, ExpectedException and Ignore methods.
TextFixture Attribute
The TestFixture attribute is an indication that a class contains test methods. When you mention this attribute to a class in your project, the Test Runner application will scan it for test methods. The following code illustrates the usage of this attribute:
[csharp]
using System;
usingNUnit.Framework;
namespaceUNitTesting
{
[TestFixture]
publicclassProgram
{
}
}
Test Attribute
The Test attribute indicates that a method within a test fixture should be run by the Test Runner application. The method must be public, return void, and will not be run when the Test Fixture is ran. The following code depicts the use of this attribute:
[csharp]
[TestFixture]
publicclassProgram
{
[Test]
publicvoid Test()
{
…
}
}
Assert Class
Assert class is used to confirm whether or not the test casesare producing the expected result by using auxiliary methods such as AreEqual() orAreNotEqual().
ExpectedException Attribute
You could fortify your code to handle all kinds of exceptions by using try...Catch block. But sometimes you have circumstances where you actually want to ensure that an exception occurs. To overcome such a problem you should use the ExpectedException attribute, as you can see below:
[csharp]
[TestFixture]
publicclassProgram
{
[Test]
[ExpectedException(typeof(DivideByZeroException))]
publicvoid Test()
{
inti=10,j=0,x;
x = i / j;
}
}
In the aforementioned code, we are intentionally committing a "divide by zero" mistake, which is detected during the NUnit Test execution.
Ignore Attribute
The Ignore attribute is required to indicate that a test should not be run on a particular method. The use the Ignore attribute is as follows:
[csharp][TestFixture]
publicclassProgram
{
[Test]
[Ignore("This method is skipping")]
publicvoid Test()
{
…
}
}
Simple Business Logic Project
In the following scenario, we are implementing Discounts on particular sales made bycustomers, such as 5% discount on $1000 to $1999 purchases, 10% on $2000 to $4999 and so on. Such discounts will be deducted automatically in the final payment based on some implicit calculation stated in the business logic.
- Create a C#.net Class Library project called UnitTest to produce a DLL
- Rename class1 to UtilityLib and put the following business logic:
- Now, build the project and notice that the UnitTest.dll file is created in the solution Bin/Debug folder, which willbe referenced in the Unit Test project later
[csharp]using System;
usingSystem.Text;
namespaceUnitTest
{
publicclassUtilityLib
{
publicdoublecalculateDiscount(doubleSalesAmnt)
{
if (SalesAmnt == 0 || SalesAmnt< 0)
{
thrownewArgumentException(" Sales Amount should not be 'Zero/Negative'");
}
elseif (SalesAmnt>= 1000 &&SalesAmnt< 2000)
{
// 5% Discount
DiscountPrice = SalesAmnt - (SalesAmnt * 0.05);
elseif (SalesAmnt>= 2000 &&SalesAmnt< 5000)
{
// 10% Discount
DiscountPrice = SalesAmnt - (SalesAmnt * 0.1);
elseif (SalesAmnt>= 5000 &&SalesAmnt< 20000)
{
// 50% Discount
DiscountPrice = SalesAmnt - (SalesAmnt * 0.5);
}
else
{
// No Discount
DiscountPrice = SalesAmnt - 0.0;
returnDiscountPrice;
}
}
}
Test-Driven Project Development
There are a few steps needed to execute the unit test using NUnit:
- Create another C#.net Class Library projectand call itUtilityLibtesting
- Then, add the reference of the UnitTest.dll file and the NUnit framework DLL files, which are located in the "Program FilesNUnit 2.6.2binframeworknunit.framework.dll" directory
[caption id="" align="alignnone" width="252"]
 Figure 1.3 Add references of NUnit framework and UnitTest.dll[/caption]
 -
Now add the namespace definition to the class library file:
usingNUnit.Framework;
usingUnitTest; - Rename class1.cs toTestCase.cs with the TextFixture attribute.
- It is time to write test case methods to verify whether the business logic stated in the DLL file is producing the expected result or not.
- So we write another independent method for each correspond function given in the DLL file with the [test] attribute and we are also using the assert class to theAreEqual() method in order to confirm the desired result. The AreEqual() method takes two arguments; the first is the expected result and second the particular method with argument is defined in the business logic class.
- We also put the condition for actual test cases by using the assert class AreNotEqual() method, in which we pass any value as the first argument, as following:
- Thereafter,we mention the rest of code for each condition, as following:
- Finally, build the project and you will notice that UtilityLibTesting.dll file is created into the project solution directory, whichwillbe used later during the unit testing in the NUnit application.
[csharp]// Test Case#1: Sales Amount is Greater or Equal than 1000 : Verification
[Test]
publicvoidOneThousand_G_E()
{
Assert.AreEqual(950,obj.calculateDiscount(1000));
}
[csharp]//__________Test for Actual Results__________
// Test Case#6: Sales Amount is not producing expected Result : Verification
[Test]
publicvoidOneThousand()
{
Assert.AreNotEqual(930, obj.calculateDiscount(1000));
}
[csharp]using System;
usingNUnit.Framework;
namespaceUtilityLibTesting
{
[TestFixture]
publicclassTestCase
{
// Test Case#1: Sales Amount is Greater or Equal than 1000 : Verification
[Test]
publicvoidOneThousand_G_E()
{
Assert.AreEqual(950,obj.calculateDiscount(1000));
}
// Test Case#2: Sales Amount is Greater or Equal than 2000 : Verification
[Test]
publicvoidTwoThousand_G_E()
{
Assert.AreEqual(1800, obj.calculateDiscount(2000));
}
// Test Case#3: Sales Amount is Greater or Equal than 5000 : Verification
[Test]
publicvoidFiveThousand_G_E()
{
Assert.AreEqual(2500, obj.calculateDiscount(5000));
}
// Test Case#4: Sales Amount is 0 : Verification
[Test]
publicvoidZeroAmount()
{
UtilityLibobj = newUtilityLib();
try
{
obj.calculateDiscount(0);
}
}
// Test Case#5: Sales Amount is below 1000 : Verification
[Test]
publicvoidOneThousand_Below()
{
UtilityLibobj = newUtilityLib();
Assert.AreEqual(999, obj.calculateDiscount(999));
//__________Test for Actual Results__________
// Test Case#6: Sales Amount is not producing expected Result : Verification
[Test]
publicvoidOneThousand()
{
Assert.AreNotEqual(930, obj.calculateDiscount(1000));
}
// Test Case#7: Sales Amount is not producing expected Result : Verification
[Test]
publicvoidTwoThousand()
{
Assert.AreNotEqual(1900, obj.calculateDiscount(2000));
}
}
}
[caption id="" align="alignnone" width="599"] Figure 1.4 NUnit Testing.exe depict[/caption]
Running Test Case
Up until now,we have seen the basics of the code; now it is time to run your tests via the NUnit GUI. To use the GUI application, just simply run the software and target (open project)your test assembly where it is located. The test assembly is the class library (or executable) that contains the Test Fixtures. The application will then show you a graphical view of each class. To run the entire suite of tests, simply click the Run button. If you want to only run one Test Fixture or even just a single test, you can double-click it in the tree. After opening the project file, all the methods stated in the DLL file will show up in left pane, as shown in the picture below:
[caption id="" align="alignnone" width="540"] Figure 1.5 Test Method Loading[/caption]
Now hit the Run button on the right side to start the Unit Automotive testing. It will take some time to verify all the conditions given in the test cases. If all the methods function properly as per the test condition, then the GUI will produce the results in the green progress bar, as shown below:
[caption id="" align="alignnone" width="623"] Figure 1.6 NUnit Test Report with No Error[/caption]
In the scenario above, if the code has some in-built programming glitches, then they are easily rectified during the NUnit Testing process. The following picture depicts a problem in the TwoThousand() method with a cross sign. Here, the report suggests that all the methods implementations are working properly, except one method.
[caption id="" align="alignnone" width="623"] Figure 1.7 NUnit Test Fail output[/caption]
We can go deeper in the error by using the errors and failure tab shown in the bottom right. This will display the exact error in the source code, as seen below:

[caption id="" align="alignnone" width="576"] Figure 1.6 NUnit Detailed Test Report with Error[/caption]
In this Series
- Automation Unit Testing with NUnit
- DevSecOps: Moving from “shift left” to “born left”
- What’s new in the OWASP Top 10 for 2023?
- DevSecOps: Continuous Integration Continuous Delivery (CI-CD) tools
- Introduction to DevSecOps and its evolution and statistics
- MongoDB (part 3): How to secure data
- MongoDB (part 2): How to manage data using CRUD operations
- MongoDB (part 1): How to design a schemaless, NoSQL database
- Understanding the DevSecOps Pipeline
- API Security: How to take a layered approach to protect your data
- How to find the perfect security partner for your company
- Security gives your company a competitive advantage
- 3 major flaws of the black-box approach to security testing
- Can bug bounty programs replace dedicated security testing?
- The 7 steps of ethical hacking
- Laravel authorization best practices and tips
- Learn how to do application security right in your organization
- How to use authorization in Laravel: Gates, policies, roles and permissions
- Is your company testing security often enough?
- Authentication vs. authorization: Which one should you use, and when?
- Why your company should prioritize security vulnerabilities by severity
- There’s no such thing as “done” with application security
- Understanding hackers: The insider threat
- Understanding hackers: The 5 primary types of external attackers
- Want to improve the security of your application? Think like a hacker
- 5 problems with securing applications
- Why you should build security into your system, rather than bolt it on
- Why a skills shortage is one of the biggest security challenges for companies
- How should your company think about investing in security?
- How to carry out a watering hole attack: Examples and video walkthrough
- How cross-site scripting attacks work: Examples and video walkthrough
- How SQL injection attacks work: Examples and video walkthrough
- Securing the Kubernetes cluster
- How to run a software composition analysis tool
- How to run a SAST (static application security test): tips & tools
- How to run an interactive application security test (IAST): Tips & tools
- How to run a dynamic application security test (DAST): Tips & tools
- Introduction to Kubernetes security
- Key findings from ESG’s Modern Application Development Security report
- Microsoft’s Project OneFuzz Framework with Azure: Overview and concerns
- Software maturity models for AppSec initiatives
- Best free and open source SQL injection tools [updated 2021]
- Pysa 101: Overview of Facebook’s open-source Python code analysis tool
- Improving web application security with purple teams
- Open-source application security flaws: What you should know and how to spot them
- Android app security: Over 12,000 popular Android apps contain undocumented backdoors
- 13 common web app vulnerabilities not included in the OWASP Top 10
- Fuzzing, security testing and tips for a career in AppSec
- 14 best open-source web application vulnerability scanners [updated for 2020]
- 6 ways to address the OWASP top 10 vulnerabilities
- Ways to protect your mobile applications against hacking

Get certified and advance your career
- Exam Pass Guarantee
- Live instruction
- CompTIA, ISACA, (ISC)², Cisco, Microsoft and more!

Application security
Application security
Application security
DevSecOps: Continuous Integration Continuous Delivery (CI-CD) tools
Application security